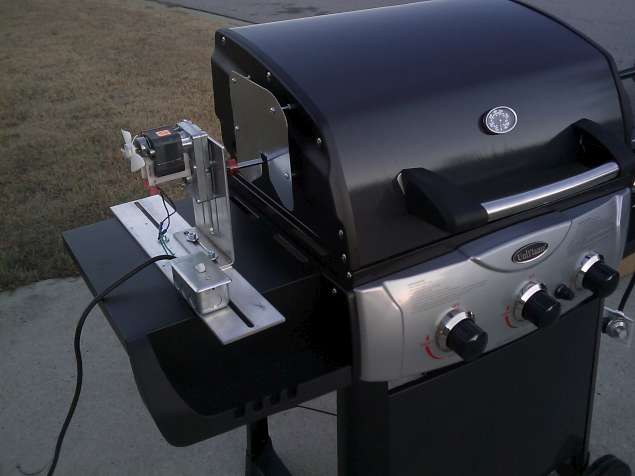
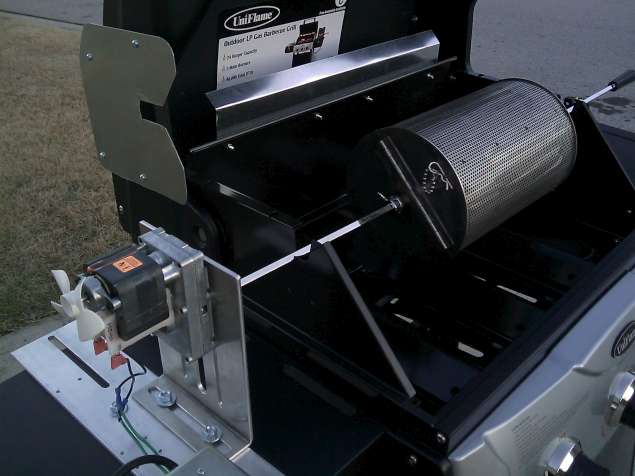
A very hot motor doesn’t work very well. Generally, what will happen is the motor will suddenly shut off and not start again until it has cooled off sufficiently. This is a very inconvenient occurrence during a roast, which is why we recommend a setup that allows a minimum of 3 inches between the rotisserie cutout and the motor plate. However, in some situations, it is not possible. Sometimes, the rotisserie rod isn’t long enough to provide the 3 inches of space, and sometimes, the side tray on the grill doesn’t provide enough area. Whatever the reason, you’ll need another way to limit the heat that the motor is exposed to.
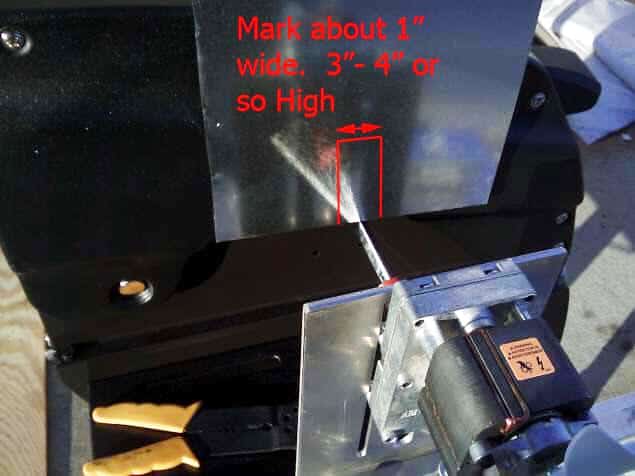
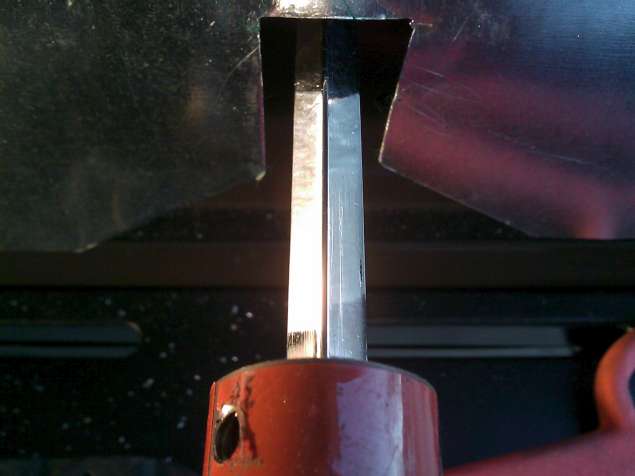
The heat that is causing the motor to overheat and shut off is escaping out through the cutout of the rotisserie rod. So, to reduce the heat the motor is exposed to, our goal is to block some of this heat escaping through the cutout. One way to do this is to build a shield that redirects the heat before it reaches the motor.
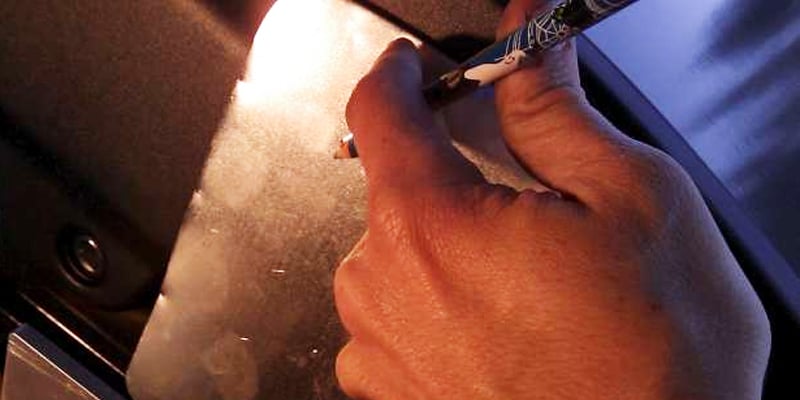
Sheet Metal will cut you open in a flat second. Use gloves and be aware that it will get you. I know better, I’ve done it many times, I’m experienced in Aircraft repair and construction with sheet metal, aluminum. I told myself, “Be careful, you could get cut”. Guess what, yep, I got cut….during the assembly of this nice machine. Be careful, don’t work aggressively with this stuff, you push or shove and slip, you’ll be getting stitches. Be firm, gentle, careful, plan your actions and movements and don’t swing or hammer wildly at this stuff, you slip and it gets you.
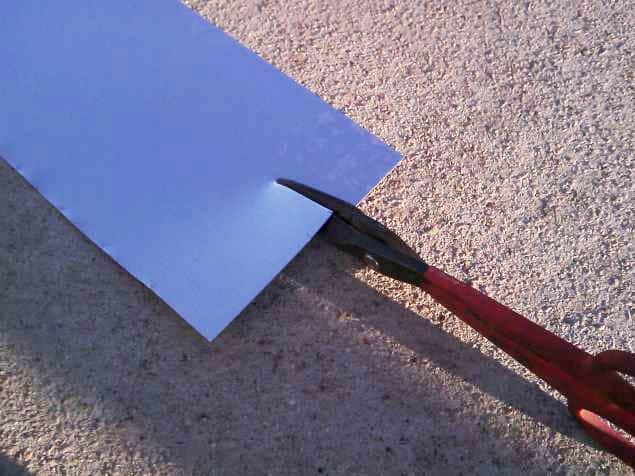
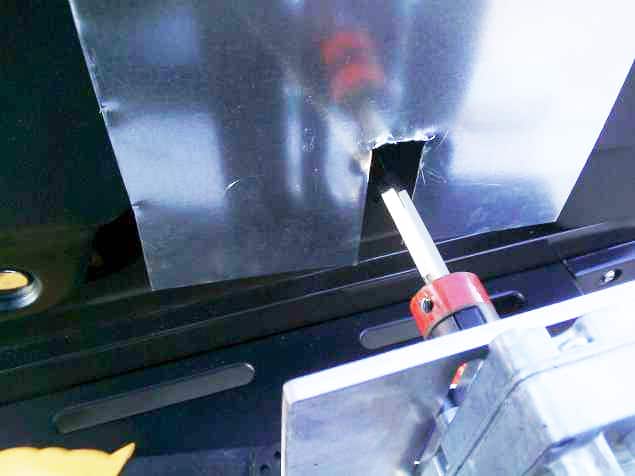
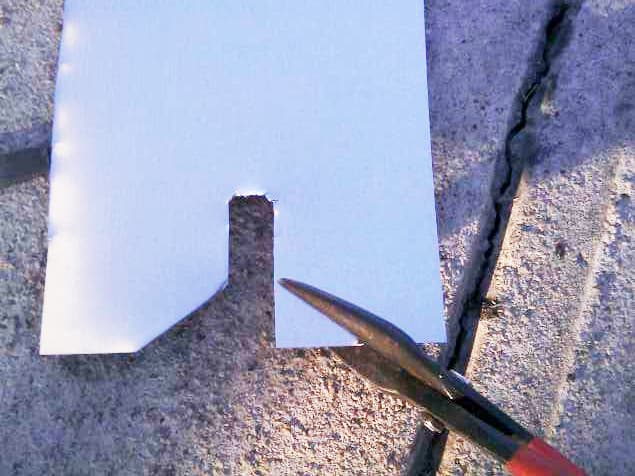
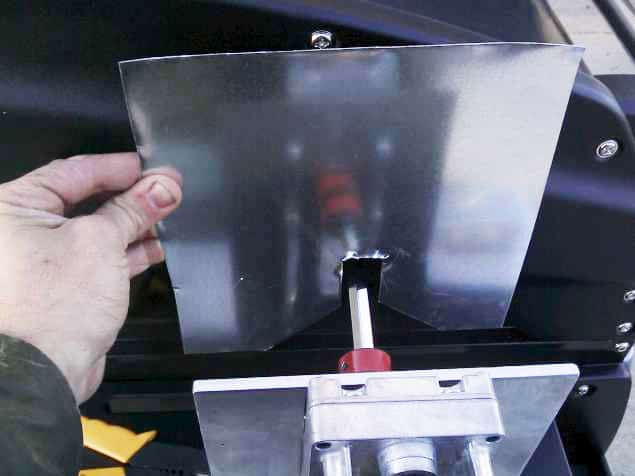
If you’re lucky, you’ll have some sheet metal cutters – this is the best tool for the job. But, since I don’t, I’ll make do with I have, in this case, some tin snips. You should be able to do this at home, without professional equipment. In Figures 4 and 5, you’ll see the cutting in progress and the finished piece. After you’re done cutting, hold it up to the grill to make sure it will fit.
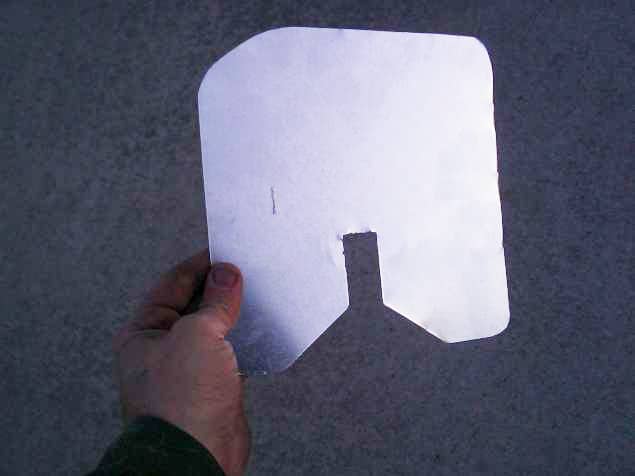
To make opening and closing the grill hood smooth, cut off the corners of the slot, as shown in Figure 6. This will remove the corners that would get caught each time the hood is lifted or let down. At this point, we will also trim off the top (see Figure 7). For now, go longer than is necessary – we can always cut more, but we can’t put it back together!
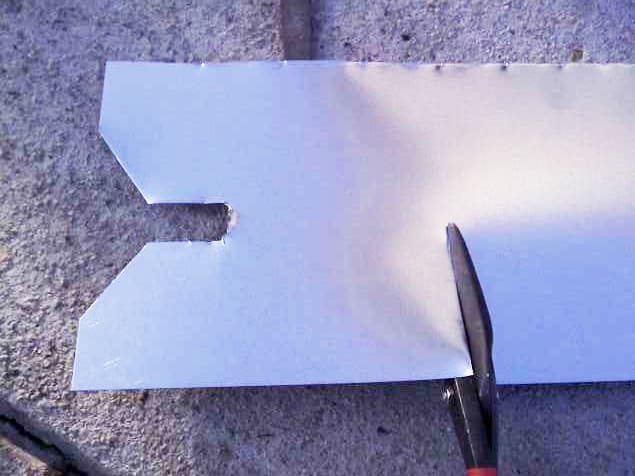
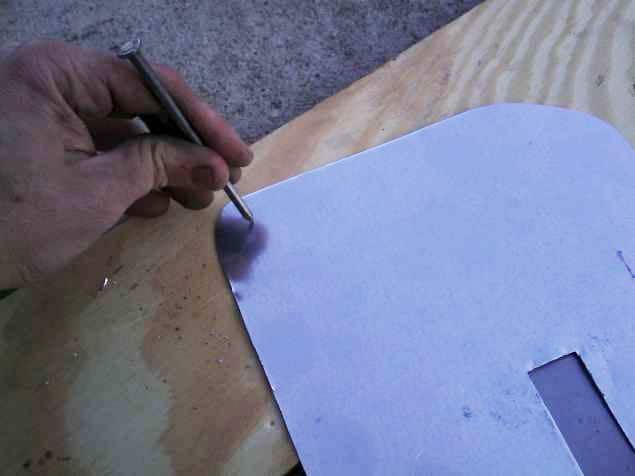
After cutting the corners and trimming the top, hold it up to the grill to roughly inspect the fit, (Figure 8). Then, again using the tin snips, we can round out some of the hard edges, (Figure 9).
After rounding out the edges, it looks a little nicer, and is less likely to cause injury.
Now that the heat shield is cut and smoothed, we are ready to attach it to the hood of the grill. Remember that the shield should open and close with the grill hood, so keep all the holes and marks on the hood and not on the base of the grill.
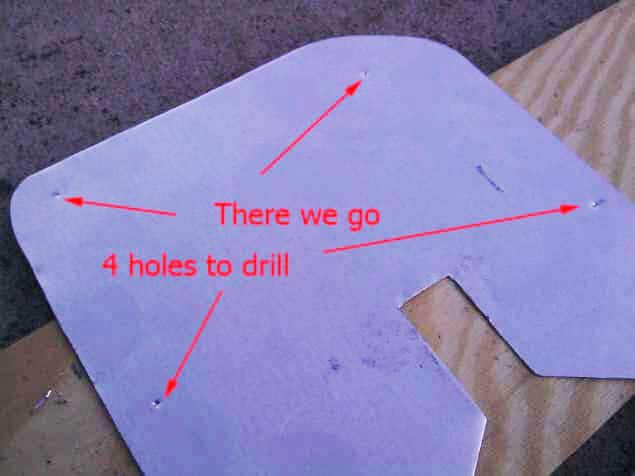
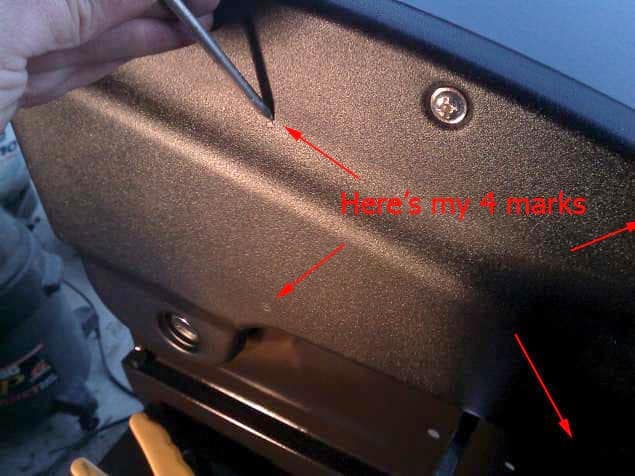
Holding the heat shield up to the grill in one hand, and a pencil in the other, mark on the heat shield 4 spots where it can be drilled to attach to the grill hood. These should preferably be in the 4 corners of the heat shield. The corners offer the most support and keep the shield from accidentally getting bent.
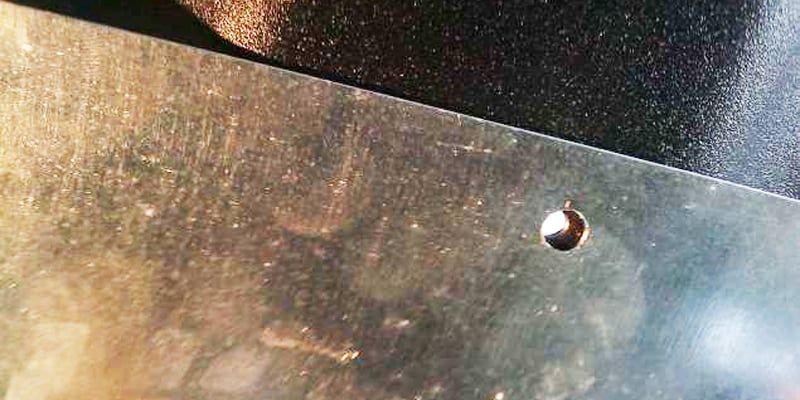
If you have a center punch, then you can use that to mark indentations in the metal to hold the drill on point as it drills through the metal. If not, a hammer and nail will work just fine to mark the center point. Use either your center punch or nail to mark each of the 4 spots that were marked as good places to attach to the grill hood.
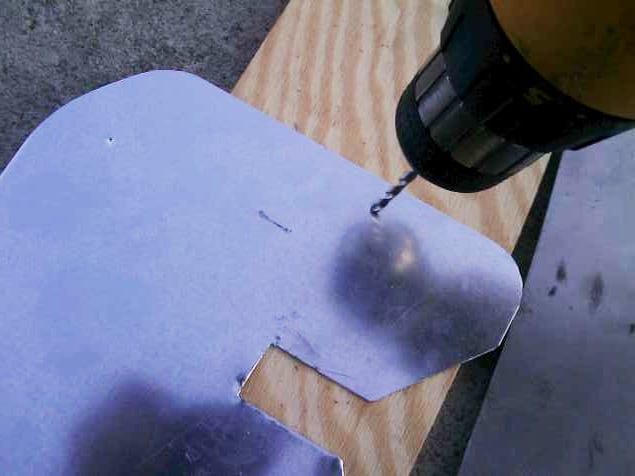
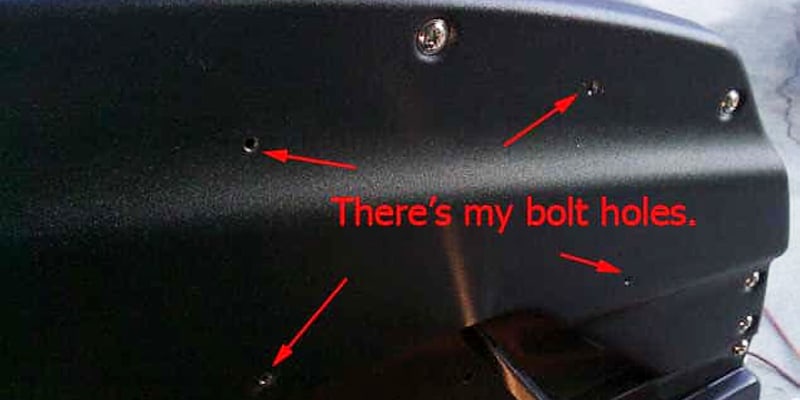
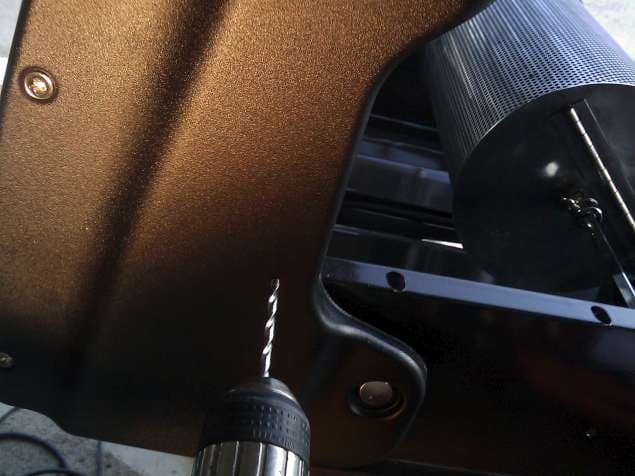
Next, find some scrap metal to catch the drill bit as it drills through the metal. Then, place the drill bit in each of the 4 indentations and drill through the sheet metal.
Now, we will use the center punch or hammer and nail as before, but this time on the grill hood. Once the marks are dented, drill through each indentation.
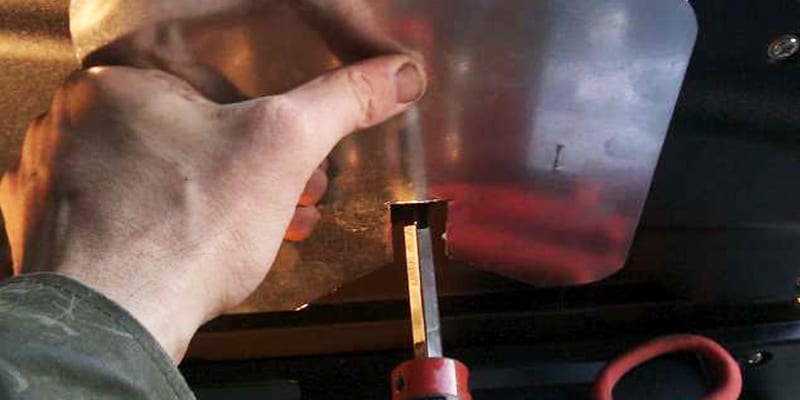
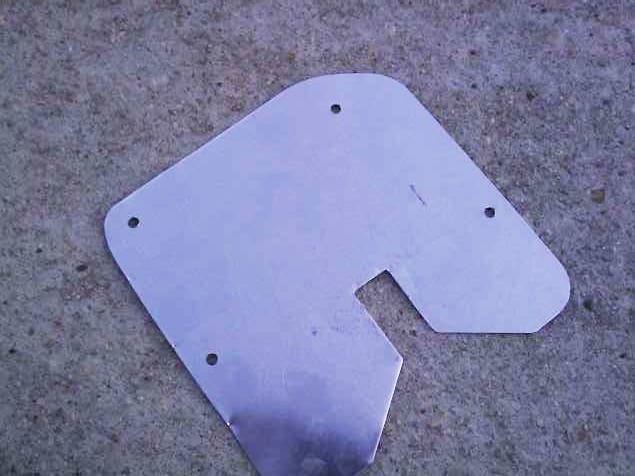
Before finally attaching the heat shield to the grill hood, there are two things that need to be done. First, make sure that the bolt holes on the heat shield and grill hood are matching up. If not, you will need to make adjustments, so that the heat shield can be bolted onto the grill hood. Second, you will want to use a metal file and file any sharp points or edges. Before you install it, you want to make sure it is clean and smooth, so that you can’t get cut on it once you start to roast coffee. If you don’t have a metal file, I’ve actually used the concrete driveway in times past to file down the sheet metal. It’s a little more difficult, but in a pinch the concrete driveway will do the job.
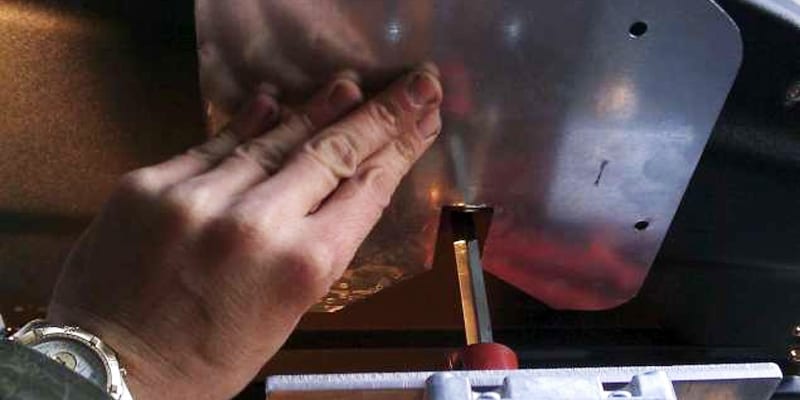
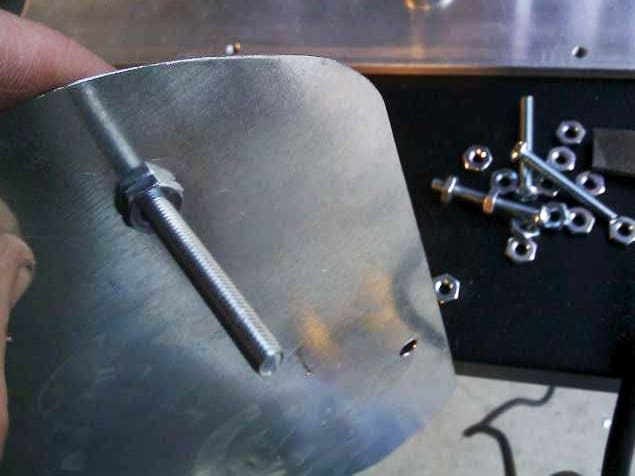
Finally, the heat shield is ready for assembly. To attach the heat shield to the grill hood, you will need 4 2″ bolts or so, and 12 nuts, 3 nuts per bolt (Figure 21). Insert the bolts into each hole, with the threads towards the grill. Run a nut all the way to the metal and tighten (Figure 22).
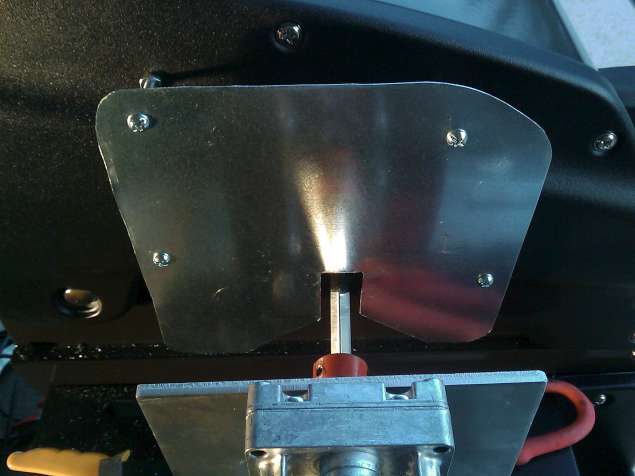
After the bolts have been secured to the heat shield, put another nut onto each bolt. This second bolt allows you to control how deep the bolt goes into the grill. If you have limited space inside your grill, this is a handy way to keep the bolts from interfering with your roasting drum.
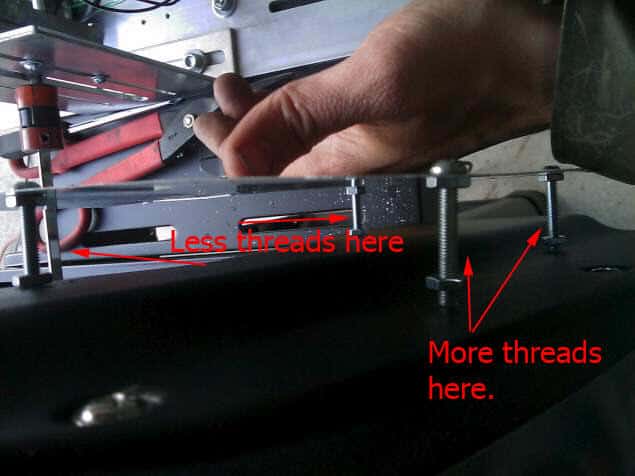
Mount your shield up on the grill. See if your bolts line up. The beauty with the threaded bolts are that you can adjust the height of each bolt based on the contour of the grill. Adjust the nuts until the shield sits nice and even. (Figure 25)
Here’s the inside view, some bolts will be longer than others, this is OK. Tighten the shield down to the grill. (Figures 26 and 27)
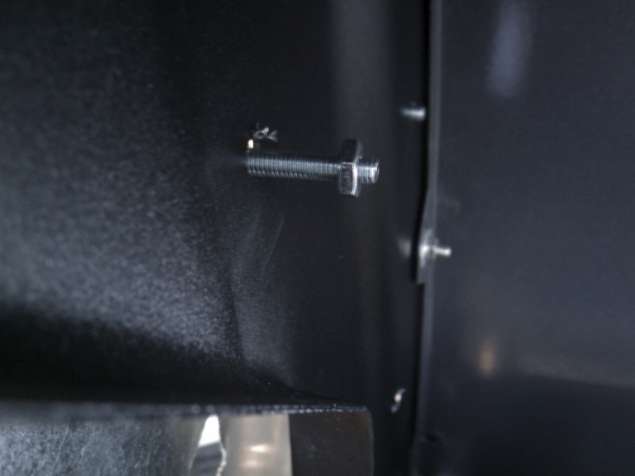
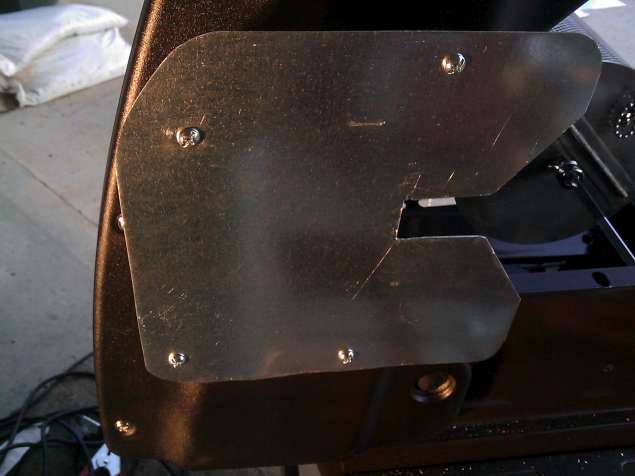
Now, the heat shield should be firmly attached to the grill hood. You can test opening and closing the hood to ensure that there is no interference with the heat shield. (Figure 28 and 29)
Look closely at the heat shield as you open and close the grill hood. If there is a problem with the heat shield, this is where the problem will be. Any interference while opening and closing the grill can be resolved by cutting and filing away additional material from the corners of the heat shield. (Figure 30)